
WiFiManager with ESP8266 NodeMCU

In this tutorial you’ll learn how to use WiFiManager with the ESP8266 board.
WiFiManager allows you to connect your ESP8266 to different Access Points (AP)
without having to hard-code and upload new code to your board. Additionally, you
can also add custom parameters (variables) and manage multiple SSID connections
with the WiFiManager library.
How WiFiManager Works with ESP8266 NodeMCU:
The WiFiManager is a great library do add to your ESP8266 projects, because
using this library you no longer have to hard-code your network credentials (SSID
and password). Your ESP will automatically join a known network or set up an
Access Point that you can use to configure the network credentials. Here’s how this
process works:
- When your ESP8266 NodeMCU boots, it is set up in Station mode, and tries to connect to a previously saved Access Point (a known SSID and password combination);
- If this process fails, it sets the ESP into Access Point mode;
- Using any Wi-Fi enabled device with a browser, connect to the newly created Access Point (default name AutoConnectAP);
- After establishing a connection with the AutoConnectAP, you can go to the default IP address 192.168.4.1 to open a web page that allows you to configure your SSID and password;
- Once a new SSID and password is set, the ESP reboots and tries to connect;
- If it establishes a connection, the process is completed successfully. Otherwise, it will be set up as an Access Point.
Requirements:
You also need to install the
1. WiFiManager Library
2. ArduinoJSON Library.
Code
#include <ESP8266WiFi.h> //https://github.com/esp8266/Arduino
//needed for library
#include <DNSServer.h>
#include <ESP8266WebServer.h>
#include <WiFiManager.h> //https://github.com/tzapu/WiFiManager
void setup() {
// put your setup code here, to run once:
Serial.begin(115200);
//WiFiManager
//Local intialization. Once its business is done, there is no need to keep it around
WiFiManager wifiManager;
//reset saved settings
//wifiManager.resetSettings();
//set custom ip for portal
//wifiManager.setAPStaticIPConfig(IPAddress(10,0,1,1), IPAddress(10,0,1,1),
IPAddress(255,255,255,0));
//fetches ssid and pass from eeprom and tries to connect
//if it does not connect it starts an access point with the specified name
//here "AutoConnectAP"
//and goes into a blocking loop awaiting configuration
wifiManager.autoConnect("AutoConnectAP");
//or use this for auto generated name ESP + ChipID
//wifiManager.autoConnect();
//if you get here you have connected to the WiFi
Serial.println("connected...yeey :)");
}
void loop() {
// put your main code here, to run repeatedly:
}
This code needs to include the following libraries for the WiFiManager:
#include <DNSServer.h>
#include <ESP8266WebServer.h>
#include <WiFiManager.h>
You also need to create a WiFiManager object:
WiFiManager wifiManager;
And run the autoConnect() method:
wifiManager.autoConnect("AutoConnectAP");
That’s it! By adding these new lines of code to your ESP8266 projects, you’re able to
configure Wi-Fi credentials using the WiFiManager.
Accessing the WiFiManager AP
If it’s your first time running the WiFiManager code with your ESP8266 board, you’ll
see the next messages being printed in your Arduino IDE Serial Monitor.
You can either use your computer/laptop to connect to the AutoConnectAP Access
point:(As shown in figure 1.1)
Then, open your browser and type the following IP address: 192.168.4.1 . This loads
the next web page, where you can set your Wi-Fi credentials:(As shown in figure 1.2)
Configuring the WiFi page.(As shown Figure 1.3)
You’ll be redirected to a web page at 192.168.4.1 that allows you to configure your
ESP’s WiFi credentials. Press the “ Configure WiFi ” button:(As shown figure 1.4)
After Press the “ Configure WiFi ” button then shown SSID.(As shown figure 1.5)
Choose your desired network by tapping its name and the SSID should be filled
instantly.(As shown figure 1.6)
After that, type your password.(As shown figure 1.7)
Then press “ save “: (As shown figure 1.8)
You’ll see a similar message saying “ Credentials Saved “:(As shown figure 1.9)
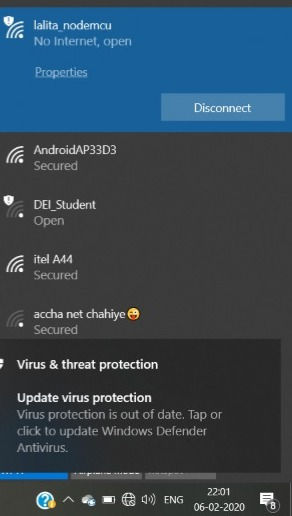
Figure 1.1
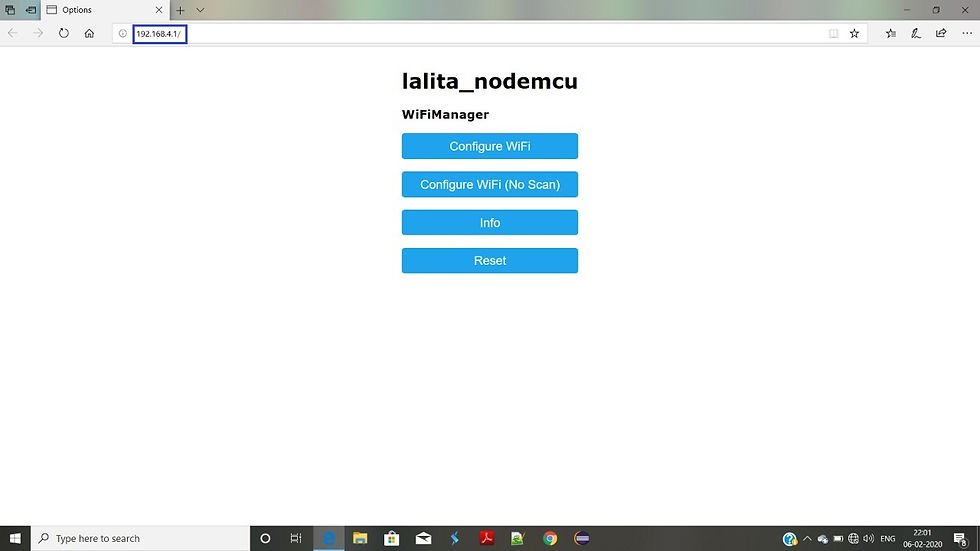
figure 1.2
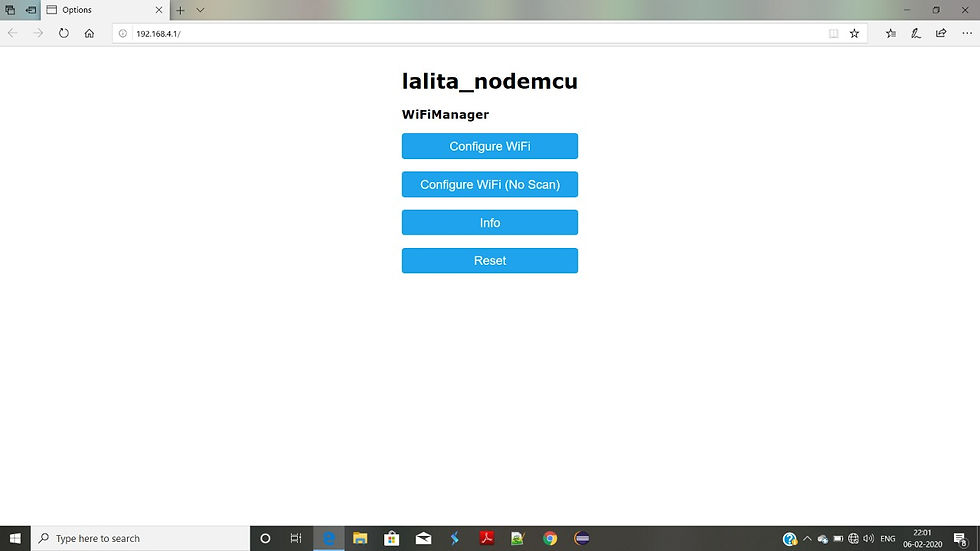
Figure 1.3
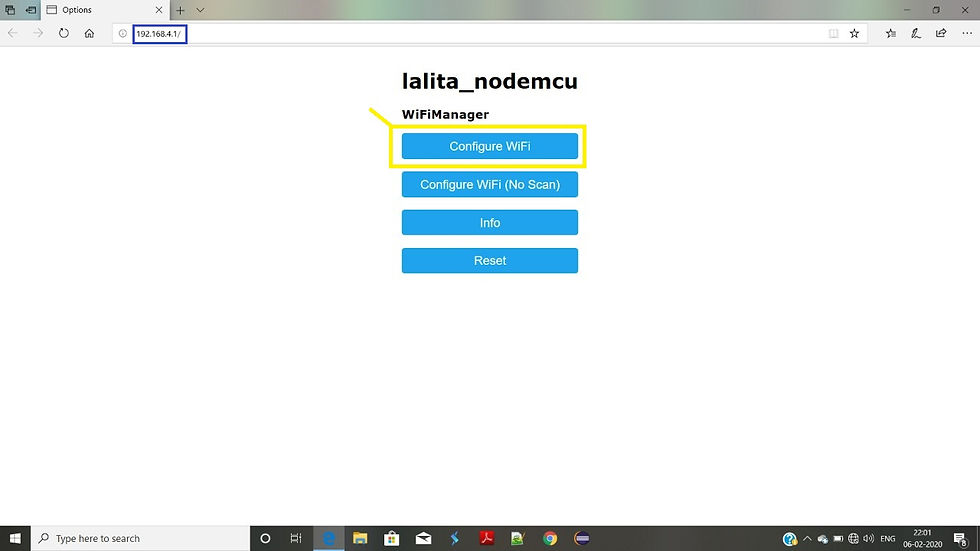
figure1.4

Figure 1.5
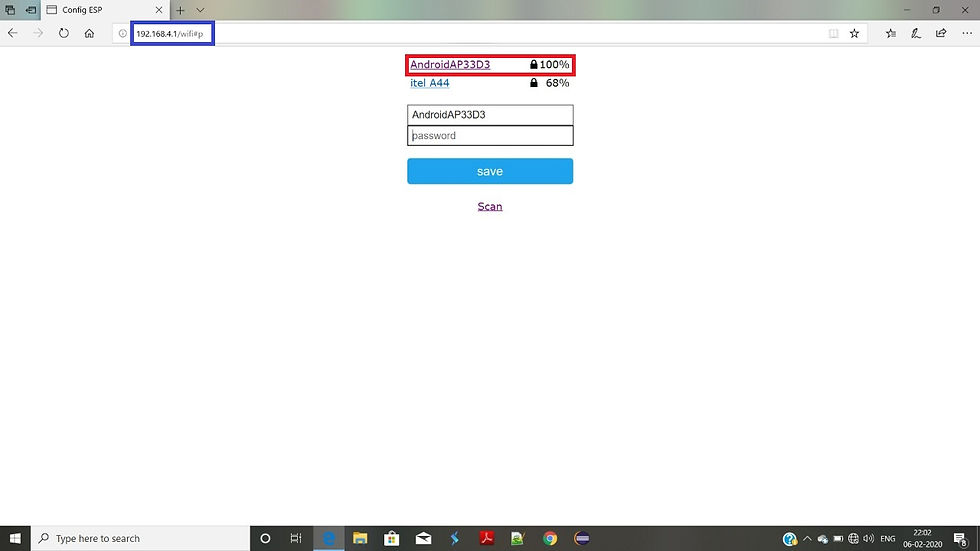
figure 1.6
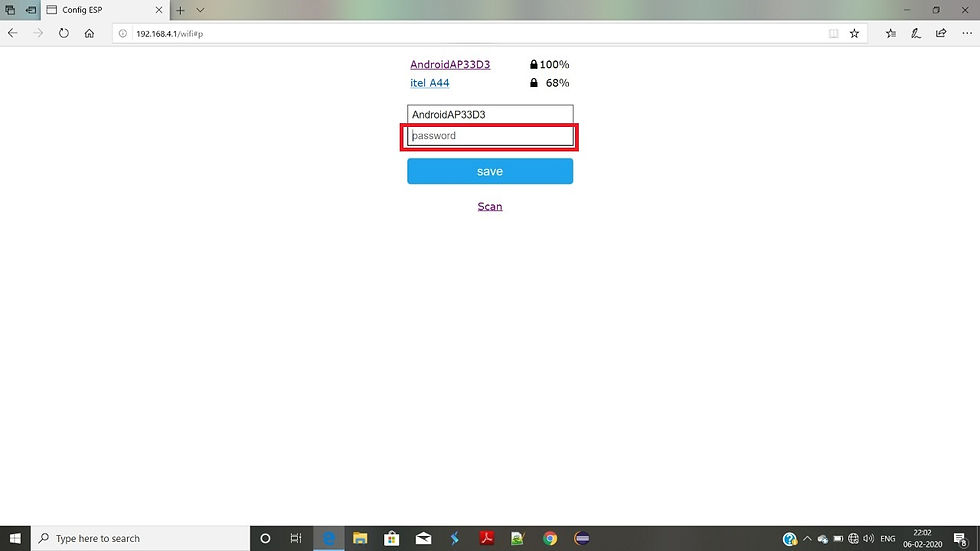
figure 1.7
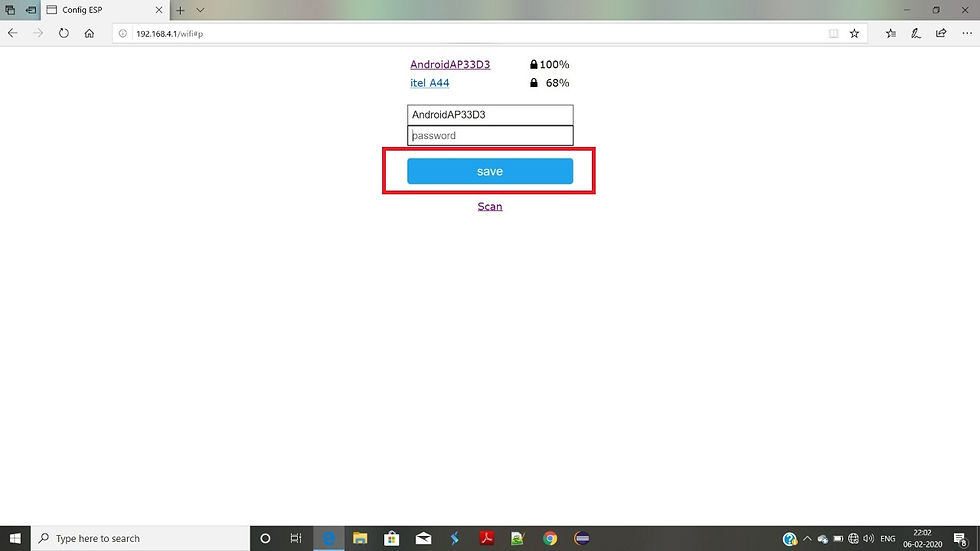
figure 1.8
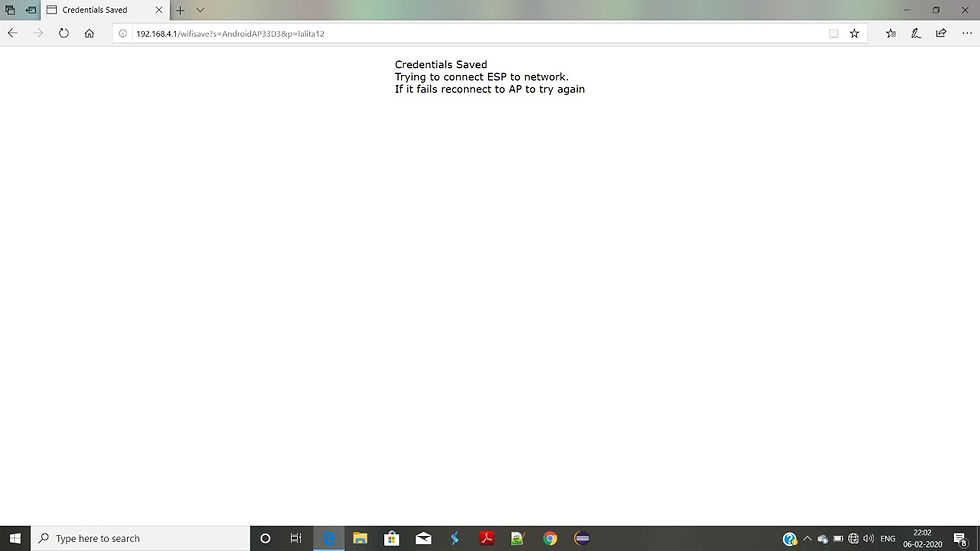
Figure 1.9